How to Change Logo on Boot in Window|| Window 10 Boot Logo Changer
Windows 10 is the latest version of windows and it is the best version yet. But just like windows 7 and windows 8, it is boring to look at and much more exciting to use. 8oot logo changer is a free tool designed to change the default boot logo picture of the windows boot screen with a custom picture. The tool does the job by replacing first of all, you need access to bootres. Dll, which is located in c: windows boot resources bootsres. Takeown /f c:windowsb wim file you extracted in the previous step using 7-zip and extract the images to the folder you made to edit them. 7. Open any image editor and make an image of the same. …
Let’s be honest for once.
When we boot into our trusty Windows 10, we are either greeted with the hardware manufacturer’s logo or the newest Windows Logo at the start screen.
It reminds time to time that we are not in complete control of our devices.
Wouldn’t it be cool if you could be greeted with your favorite superhero or just your boy/girlfriend’s image?
Sounds cheesy?
Well, the high minds ha d already made the solutions available to us. It is just finding and setting it up in the correct manner.
Today, we are going through the rundown of the best windows boot logo changer software.
Windows 10 is the latest version of Windows and It is the best version of Windows yet. But just like Windows 7 and Windows 8, It is a bit boring to look at and much more exciting to use. If you want to make Windows 10 Boot Screen more interesting, you can use Windows Vista Boot Screen for that. Windows Vista Boot Logo Changer is a utility to replace the default boot screen logo of Windows 10 with your own custom logo which can be PNG image.
Before we do anything, here’s a disclaimer.
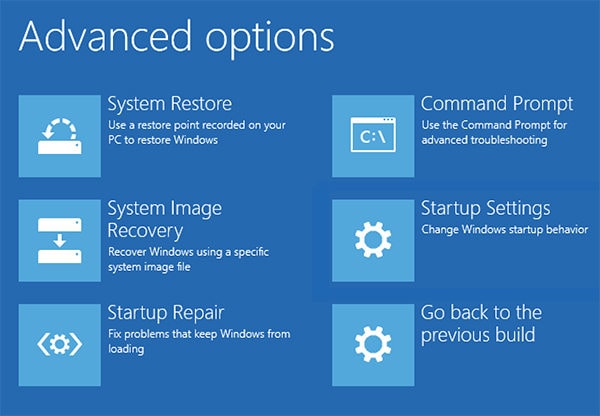
Making changes to the bootloader is risky, and could make your system unbootable. It is suggested that you have a proper Windows Recovery Media if anything goes haywire.
1. HackBGRT
HackBGRT only supports UEFI and not basic BIOS. Make sure your computer supports it (Almost all newest devices are UEFI based, but it is best to double-check).
Here is a simple How-To:
1. Get the latest release from the Releases page. https://github.com/Metabolix/HackBGRT
2. Start setup.exe and follow the instructions. You may need to disable Secure Boot manually.
3. The installer will launch Notepad for modifying the configuration.
4. For one custom image, the defaults are fine. Else, check out the examples in the configuration file. In this configuration file, you need to specify the path to the image that you want to display and other parameters such as positioning, etc. You can specify multiple images that will be picked up randomly.
5. The installer will launch Paint for creating the image(s). You can create multiple images, just sure to always use the 24-bit BMP/DIB format.
6. After the images are saved, the program will make all the changes.
Additionally, you can follow Readme for the GitHub repository to enable such settings for multi-OS systems.
When you mess up and want to remove the default logo, press D in the CMD window.
Additionally, you can use the backup of the bootloader that was created by HackBGRT to recover the bootloader. Copy “[EFI System Partition]EFIHackBGRTbootmgfw-original.efi” to “[EFI System Partition]EFIMicrosoftBootbootmgfw.efi”.
2. 8oot Logo Changer Tool
It is a free tool designed to change the default boot logo picture of the Windows boot screen with a custom picture. The tool does the job by replacing the default images in the bootloader.
For this, one needs to turn Test Signing mode on. Changing the boot screen logo when Test Signing mode is turned off will show a blank boot screen. The only caveat is that you might see Test Mode watermark at the bottom right area of the desktop. It can be turned off by using a patcher in 8oot to hide the watermark by editing shell32.dll.mui and basebrd.dll.mui. Backup original files using ‘Backup shell32.dll.mui’ and ‘Backup basebrd.dll.mui buttons’ before patching.
To use it,
1. Download the tool.
2. Run the application. You may get UAC prompt, click ‘Yes’.
3. Switch to the Testmode tab. Click on Test signing checkbox to turn it on or off. For our purposes, we need to keep it checked.
4. Switch back to the Bitmaps tab and click the ‘Load Picture’ button to browse to the picture file and open the same.
5. if the picture is too large, you my want to crop the picture to your liking to use as boot logo, click the Arrow button under Edited Pictures section to generate 6 new BMPs.
6. Click on the “Generate” button to make a new bootres.dll file containing your custom boot logo.
7. You can preview the new logo by clicking the Preview button located next to the Load Picture button, for any last-minute changes, before applying the new boot logo.
8. Click on “Apply” button, which will replace the original bootres.dll logo provided by the system, with the new one; you have selected. Click Yes button on UAC prompt to replace the original bootres.dll file with the custom one.
3. Manual way
To modify the Boot screen, we can take the manual approach to have more granular control over the process.
So, how to do it.
1. First of all, you need access to bootres.dll, which is located in C: Windows Boot Resources bootres.dll.
The easiest way to do this is by using the application TakeOwnershipEx, made by WinAero. It can be used to obtain full access to files and folders on your computer.
In modern Windows, the default owner of most system files is TrustedInstaller, and all users, even users with administrative privileges to have read-only access in most cases, even if you are the administrator. TakeOwnershipEx allows users to become owners of files or folders with one click. And grants full access permissions too. So, you are the owner of the whole system files that you didn’t have access to previously.
Alternatively, you can run these command in elevated privileges.
takeown /f C:WindowsBootResourcesbootres.dll
icacls C:WindowsBootResourcesbootres.dll /grant %username%:f
2. You need to download additional soft-wares to complete the process.
Signer: Signer is a tool that makes and signs scripts or programs with self-certificates. Without certificate signing, no system files will execute.
7-Zip: 7-zip is an open source and free archiving tool, used to compress and expand data into zipped files, called archives.
Restorator: It is a utility for editing Windows resources in applications and their components; e.g,. files with. .exe, .dll, .res, .rc, and .dcr, extensions
3. To replace bootres.dll, create a directory on your C drive with any name, and copy the bootres.dll file to that folder. Create a folder called Logos inside that previous folder. This is the folder where the images you extract from the DLL will be stored, so you can edit them or take as a backup.
4. Using Restorator, open the bootres.dll file and go to the RCData section on the left.
5. Within the RCData section, you will see a file called “1”. Right click on it and extract, then select Extract as and then select extract as… and save it as RCDATA_1.wim.
6. Open the RCDATA_1.wim file you extracted in the previous step using 7-zip and extract the images to the folder you made to edit them.
7. Open any image editor and make an image of the same dimensions as the images you have extracted and saved it with a 24-bit bitmap format.
8. When you finish, use 7-Zip again to pack the edited images back into the RCDATA_1.wim file.
9. In Restorator, right-click “1” and select Assign, then click Assign to. Browse for your edited RCData_1.wim.
10. Save the DLL file.
11. Open an elevated command prompt, change to the C:Bootlogo folder by typing:
cd C:<folder name> and then type the following command in your <folder name> folder:
signer /sign sign bootres.dll
The Signer app will ask you to install a root certificate, choose yes when prompted.
12. Place your modified bootres.dll file back in the C:WindowsBootresources folder and reboot your PC!
If you could see only the boot animation (the spinning circle) and not the logo, then try one of these two things:
run the following command in a command prompt running as an administrator:
Bcdedit.exe -set TESTSIGNING ON, and reboot your PC.
Windows 8 and 10 are the latest version of Windows, and they have a few new features. One of those is a boot logo which is a Windows icon at the bottom of the screen. If you don’t like the default logo, you can now replace it with your own. It’s super easy to change logo on windows 10 boot screen.
Go to Windows 10 boot logo changer to know more about how to change logo on windows 10 boot screen.

Hello! My name is Lucas, and I am the creator of ursuperb.com. I’ve been writing about technology for almost 10 years now, and I love talking about tech news, reviews, and tutorials. I’m currently living in San Francisco, CA, and I’ve been blogging professionally since 2012. I love what I do, and I really enjoy interacting with people online. I believe in creating positive change for humanity, and I try to inspire others to do the same. You can read more about me here.
My favorite thing about Ursuperb is that I’m able to provide useful information to anyone interested in learning more about technology. No matter what kind of tech you use (computer, smartphone, tablet), you will definitely find something interesting to read on Ursuperb. So, let’s take a look at some of the topics I cover on Ursuperb:
1) How To Build An Online Business With WordPress
2) How To Make Money On YouTube Using AdSense
3) What Is Google Analytics? And Why Should You Use It?
4) How To Make Your Own Website Design Software For Free