How to Fix “We Can’t Find Your Camera 0×a00f4244 Error”?
This error occurs if the inbuilt camera app is unable to detect or access the webcam. Also, the antivirus installed on your pc may block the camera. Check if the drivers are installed and outdated generally, windows 10 detects the webcam without having any additional drivers installed on the device. If you can not find the “web if you notice that the problem started after updating the driver or camera app, then you can rollback to the previous version where the camera was working properly. If the rollback method. …
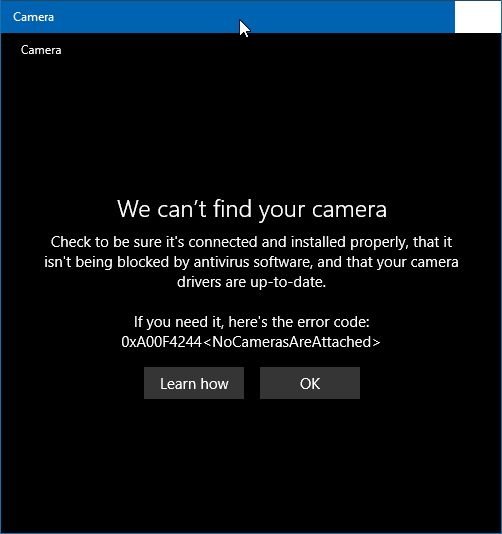
When you open the in-built camera app in Window, it may show you this error message “We can’t find your camera”.
Check to be sure it’s connected and installed correctly, that it isn’t blocked by antivirus software and that your camera drivers are up to date” with the error code 0xA00F4244.
Here in this article, I will be discussing why this error occurs and how to fix it.
Why does this error occur?
This error occurs if the inbuilt camera app is unable to detect or access the webcam.
Also, the antivirus installed on your PC may block the camera. If the installed driver for imaging devices is corrupted or not updated with your current version of Windows, then also this problem happens.
Solutions
Allow the Camera app to access the webcam:
In the Privacy settings in Windows 10, there are options to allow or block the apps from accessing the webcam. Make sure that the Camera app is not blocked to access the webcam. Follow the below process to check on this.
- Open the “Settings” from your device. Then go to “Privacy” —> “Camera“.
- Enable both the “Camera access for this device” and “Allow apps to access your camera” option.
- In “Which apps can access your camera” section, make sure that your webcam or camera has access to the app.
Check if antivirus is blocking
Most of the antiviruses are designed to protect the webcam or device camera. This feature is by default enabled.
The option to allow or block the apps to access the webcam is different for different antivirus software. But this could be found in the “Settings” option. For example, in Kaspersky Internet Security, you can find camera settings, go to Kaspersky “Settings” —> “Protection” —> “Webcam Protection“.
Disable Firewall
Like the antivirus, also firewalls may block the apps to access the webcam.
So you should disable the Firewall.
Follow the below procedure to do so.
- To disable the Firewall, open “Control Panel”.
- Click on “System and Security”, and select “Windows Firewall“.
- Then on the left panel, click on the “Turn Windows Firewall on or off“.
- Select “Turn off Windows Firewall” and restart your PC.
If you have connected the webcam via USB, then try to connect it to other USB ports.
Run the Hardware and Device Troubleshooter from “Control Panel”. Go to Control Panel —> Troubleshooting —> View All to locate built-in troubleshooters. This is to check if there is any defective Hardware or Software.
Make sure you have installed the latest version of the software. You can check them from “Settings” —> “Update & Security” —> “Windows Update” —> “Check for Updates“.
Check if the drivers are installed and outdated

Generally, Windows 10 detects the webcam without having any additional drivers installed on the device. But if you are getting ” We can’t find your camera” error, I recommend you to check if the drivers are installed or not.
- Open “Device Manager“. Find “Webcam” of “Imaging Devices“.
- Right-click on the “Webcam” option, click on “Update Driver“, click on “Search automatically for updated driver software” to check if there is an updated version of the driver available to drive the webcam.
if you can not find the “Webcam” option in the list, then the driver must be incompetent to your “webcam“. So you should download the latest version of the driver.
Make sure the camera is turned on
If for some reason, you have disabled the Windows App or Background running app, then it may cause this error. So make sure the “camera” app is turned on.
To do this, open “Settings”. Go to “Privacy settings”. Then from the left side “menu”, choose “camera”. Make sure that “Let apps use my camera hardware” is enabled. Close the “Settings” and restart your PC.
Reset or repair camera app
If still, you are getting the same error, then you should try repairing the camera app. To do this, follow the below steps.
- Go to “Settings” app —> Apps —> App & Features.
- Click on the “Camera” app. Find the “Advanced Option” and click on that.
- Scroll down the list to find the “Reset” option and click on that.
Re-install Camera app
The camera app can not be uninstalled from the “Settings” app.
We need the Windows Power shell or cleaner to delete the app and download this camera app again from the Windows store.
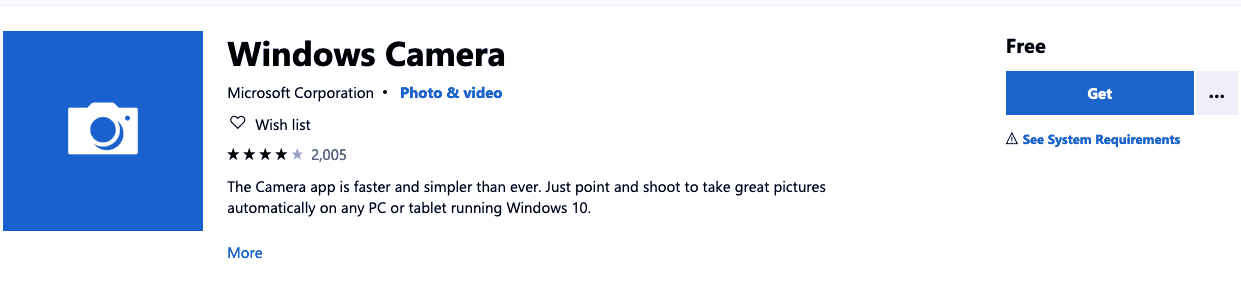
So follow the below steps to uninstall and reinstall the camera app.
- Run Windows Power Shell as administrator. To do that, right-click on the “Start” button from the “Taskbar“, and select ” Windows Power shell” (Admin). Or you can type “Power shell” in the Taskbar search section.
- At the Windows Power shell section, copy and paste this code “Get-AppxPackage-AllUsers“. Then press the “Enter” key to run the command.
- Now find the “Microsoft. WindowsCamera” entry. Select the “PackageFullName” of the camera app and press ctrl+C to copy it into the clipboard.
- Execute this command to uninstall the Camera app “Remove-Appx Package PackageFullName“. In this command, replace the “PackageFullName” with the actual name you have copied in the previous step.
Alternatively, you can use the CCleaner app to uninstall the Camera app.
To do so, open CCleaner, click tools, and select Apps. Right-click on the Camera app, and click on the “uninstall” option. Click “OK”.
- Now open the Store app, look for Windows Camera App, and install it.
Rollback Webcam Driver:
If you notice that the problem started after updating the driver or camera app, then you can rollback to the previous version where the camera was working properly. To do that, follow the below steps:
- To perform rollback driver operation, open Device Manager by pressing Windows + R keys, type devmgmt.msc and press the Enter key.
- Then from the Device Manager, find your webcam.
- Right-click on your Webcam, and select “Properties”. Now go to the Driver tab, and if ” Rollback Driver Option” is available, click on it.
- Select “Yes” to continue the Rollback process and restart your PC to complete the procedure.
Reinstall Webcam Driver
Most of the time, it is the problem with the outdated or incompatible driver.
So if the rollback method does not work, then you can try reinstalling Webcam driver. To do this, follow the below steps.
- To do this, press Windows + R, then devmgmt.msc and press Enter key.
- On Device Manager, expand Cameras.
- Right-click on your Webcam and select Uninstall Device.
- Then Restart your PC.
- Now again, open Device Manager, click on Action, choose “scan for hardware changes”.
- This will find and install the camera app driver.
Hopefully, after following the above-mentioned methods, your problem will be solved.

Hello! My name is Lucas, and I am the creator of ursuperb.com. I’ve been writing about technology for almost 10 years now, and I love talking about tech news, reviews, and tutorials. I’m currently living in San Francisco, CA, and I’ve been blogging professionally since 2012. I love what I do, and I really enjoy interacting with people online. I believe in creating positive change for humanity, and I try to inspire others to do the same. You can read more about me here.
My favorite thing about Ursuperb is that I’m able to provide useful information to anyone interested in learning more about technology. No matter what kind of tech you use (computer, smartphone, tablet), you will definitely find something interesting to read on Ursuperb. So, let’s take a look at some of the topics I cover on Ursuperb:
1) How To Build An Online Business With WordPress
2) How To Make Money On YouTube Using AdSense
3) What Is Google Analytics? And Why Should You Use It?
4) How To Make Your Own Website Design Software For Free